
Measuring the square footage of a roof isn't just a technical detail; it's a pivotal element that forms the foundation for successful projects. Accurate roof measurements serve as the cornerstones upon which well-informed decisions are built.
But here's the catch – roofs aren't simple geometric shapes. They're complex entities, complete with slopes, angles, ridges, and valleys. This complexity requires a nuanced approach to measurement, one that takes into account the unique characteristics of each roof. Whether you're aiming to calculate the amount of materials needed for a roofing project or ensure that your renovation plans align perfectly with the existing structure, understanding how to measure the square footage of a roof is an essential skill in your toolkit.
In this guide, we'll navigate the ins and outs of measuring roof square footage. We'll unravel the jargon, break down the steps, and equip you with the knowledge you need to approach this task with confidence. From the basics of measurement to accounting for slopes and incorporating modern tools, you'll learn how to handle roof measurements like a seasoned pro.
Understanding Roof Measurement Basics
Before we dive into the nitty-gritty of measuring roof square footage, let's establish a clear foundation. Square footage, in the context of roofing, refers to the total area covered by the roof's surface. This measurement is crucial for various purposes, including estimating material quantities, calculating project costs, and ensuring that the roof's dimensions align with architectural plans.
However, roofs are rarely simple shapes that fit neatly into formulas. They come with slopes, angles, dormers, and other architectural intricacies that add complexity to the measurement process. To accurately calculate the square footage, it's essential to grasp the concepts behind roofing measurements and how they differ from measuring the square footage of, say, a flat piece of land.
Enter the notion of "roofing squares." This unit of measurement simplifies the calculation process by standardizing how roofing materials are ordered and quantified. One roofing square equals 100 square feet of area. When professionals discuss roof sizes, they often refer to the number of roofing squares required, making it easier to communicate and plan.
What You Need Before Measuring a Roof
Before climbing a ladder or opening a software tool, it’s important to have the right setup in place.
Basic tools such as a ladder, measuring tape, level, and a way to record your measurements (pen and paper or a digital device) are essential for manual calculations. These tools form the foundation of any accurate measurement process.
Safety should always be a top priority. Accessing a roof can be dangerous, especially on steep pitches or in poor weather conditions. If you're unsure or the structure is complex, it may be best to work with a professional.
Another alternative is using building plans or blueprints. These documents often contain the dimensions needed to calculate square footage without physically measuring the roof, saving time and reducing risk.
Step-by-Step: How to Measure Roof Square Footage by Hand
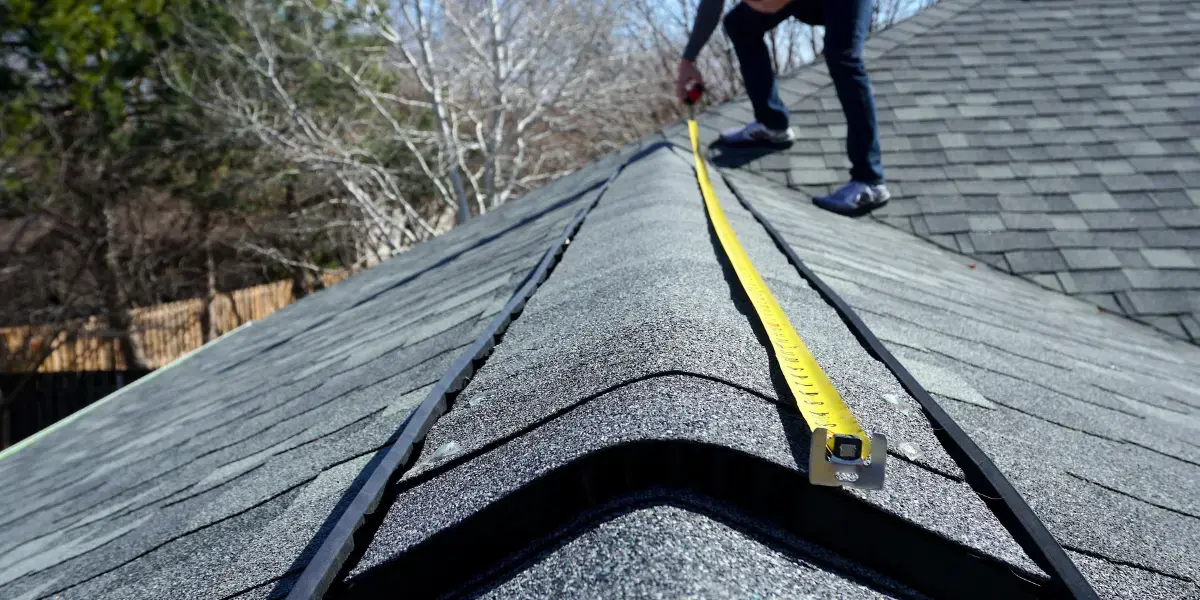
While it's not that common to measure a roof by hand these days, there are still contractors out there who want to do it by hand. If you are one of those, it's time to roll up your sleeves and delve into the process of measuring the square footage of a roof. This section outlines a step-by-step approach to help you navigate the intricacies of roof measurements with confidence.
Step 1 - Measure the Building Footprint
Begin by measuring the dimensions of the building's footprint from the ground. This involves determining the length and width of the structure. These measurements serve as the foundation for your calculations and provide an initial estimate of the roof's size.
Step 2 - Determine Roof Planes
Roof planes refer to the individual flat surfaces that make up a roof. A simple flat roof has one plane; a gable roof typically has two; and more complex roofs, like hip roofs, can have four or more.
The more roof planes involved, the more detailed your calculations will need to be. Breaking the roof into manageable sections makes the process far more accurate.
Step 3: Measure Each Roof Plane
Roofs aren't flat surfaces, so it's crucial to consider additional features. Measure the length and width of each roof plane, including sections like eaves, rakes, hips, valleys, and dormers.
Calculate the square footage of each section individually. For example, a section measuring 32 × 36 or 36 × 35 should be calculated separately before combining totals. This ensures that every protrusion and angle is accounted for.
Step 4: Account for Roof Pitch and Slope
Roof slopes add complexity to measurements. To factor in the slope, calculate the pitch ratio, which represents how much the roof rises vertically for every 12 inches it extends horizontally (e.g., 5:12).
You can then apply a pitch multiplier to adjust your square-footage calculations. Another approach is to use slope height, particularly for gable roofs, where the roof length is multiplied by the slope height to determine the true surface area.
Step 5: Add All Sections Together
Calculate the square footage of each individual roof section, including the main roof and any extensions or additions. Add these calculations together to determine the total square footage of the entire roof.
For symmetrical roofs, such as gable designs, you may need to double the calculated area to account for both sides.
Step 6: Convert to Roofing Squares
Once you have the total square footage, convert it to roofing squares by dividing it by 100.
This step is essential for material planning, as roofing materials are typically sold and estimated using this standardized unit.
Step 7: Add Waste Factor
To account for cutting errors and material overlap, add a 10% waste factor to your total.
This ensures you have enough material to complete the project without unexpected shortages.
Step 8 - Double-Check and Refine
Before finalizing your measurements, double-check your calculations. It's easy to overlook small details that can impact accuracy. Refine your measurements if needed to ensure that every aspect of the roof is accurately captured.
By following these steps, you'll be well on your way to obtaining a precise measurement of your roof's square footage. Keep in mind that attention to detail is key – every measurement counts.
Simple Roof Area Formula Example
A simple way to estimate roof area is by using the formula:
Roof Length × Slope Height
For example, if one side of a roof measures 8.7m by 6.98m, you would calculate that section first, then double it if the roof is symmetrical.
This method provides a quick, practical estimate, especially useful during the early planning stages.
Modern Tools and Software for Roof Measurement
In the digital age, technology has revolutionized many aspects of the construction industry, including roof measurement. Modern tools and software offer advanced methods that streamline the measurement process, making it more accurate and efficient than ever before.
Aerial Imagery and Drones
Aerial imagery, captured by drones or satellite imagery, provides a bird's-eye view of the roof. Drones can capture high-resolution images, which can be used to create accurate measurements. This method is particularly useful for large or complex roofs, as it reduces the need for climbing and physical measurements.
Roof Measurement Software
Numerous software applications are designed specifically for roof measurement. These tools allow you to upload images and input basic measurements to generate accurate square footage calculations. They often account for slopes, angles, and roof features, simplifying the process and minimizing the risk of errors. Some popular options include Hover and GAF Quick Measure.
Integrated Roof Data Tools
As technology continues to advance, innovative solutions like OneClick Code's integration with Eagleview Roof Squares are changing the game. With this integration, users can access roof square footage information instantly by simply inputting an address. It's a game-changer for professionals looking to streamline their workflow and obtain quick, reliable data for their roofing projects. OneClick Code is now testing a Beta version of having Eagleview Roof Squares as part of your subscription. Now, when you type in an address, you will instantly see the approximate roof size for your project!
3D Laser Scanning
For highly detailed measurements, 3D laser scanning technology offers unparalleled accuracy. This method creates a precise digital model of the roof, including all its contours and features. While this approach might be more advanced and expensive, it can be invaluable for intricate designs and critical measurements.
Why Accurate Roof Measurement Matters
Accurate measurements are critical for multiple aspects of a roofing project.
They ensure proper material estimation, including shingles, insulation, and ventilation components. They also improve cost accuracy, helping avoid overspending or shortages.
Beyond materials, accurate measurements support better project planning, ensuring alignment with the structure, design, and overall build quality.
About OneClick Data Inc.
OneClick Data Inc. is a trusted data partner dedicated to streamlining the code-sourcing process for all parties in the roofing industry while increasing efficiency and transparency for all stakeholders in construction and restoration. They have the only platform, OneClick Code, to have blazed the trail for data automation of jurisdictional authority for building codes, permit fees, taxes, and manufacturer specifications required for any address nationwide. OneClick Code has been serving customers in the contracting, insurance, and claim adjusting fields by providing instant access to trusted roofing codes with the click of a button. Offering unique reports that can be easily shared between all stakeholders in the roofing claims industry, OneClick Code adds value to all parties and empowers customers to save time and money on every claim. Welcome to restoration intelligence, automated. To learn more, please visit www.oneclickcode.com
