

Accurately calculating the amount of Ice & Water Shield (IWS) is critical for both compliance and constructing a durable roof. In colder climates or those subject to freeze-thaw cycles, underestimating this membrane can lead to water intrusion and ice-related damage. At OneClick Code, we deliver precise IWS requirements based on the authority having jurisdiction, so roofing contractors, adjusters, and carriers all have the single source of truth for compliant roofing claims.
What is Ice and Water Shield?
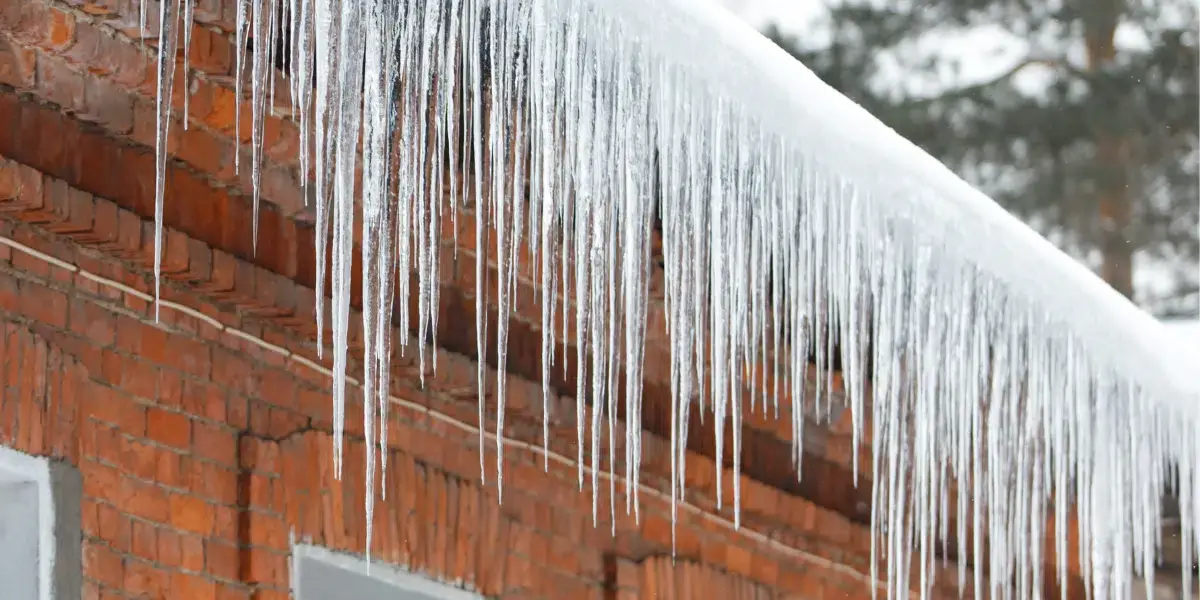
When ice at the bottom of a roof doesn’t melt, it can create a barrier, like an ice dam. When heat from inside the house helps the ice at the top of the roof melt, this water can become trapped in the “ice dam” and eventually leak into the house, causing damage to the roof.
To prevent this from happening, Ice and Water Shield (IWS) is installed - a waterproof membrane that keeps the water from infiltrating the roof.
Before installing IWS on a roof, you first need to know if that’s necessary and calculate the correct IWS size for each particular roof. However, that might not be as easy and straightforward as it sounds, since a lot of elements go into determining if IWS is necessary and how much of it will be needed.

What happens if you get it wrong?
The problem with getting your Ice and Water Shield measurements wrong is that it can lead to water damage to the roof in the long run. When the IWS is not the proper size, the ice dam can hold enough water that eventually goes over the shield and infiltrates the roof. That’s why there’s no one size fits all, as many factors play into how big the Ice and Water Shield should be.
Another big problem with IWS is determining the municipality with jurisdiction over the building, as they will be the ones to provide you with important information, such as if the area has a history of ice forming along the eaves causing a backup of water.
When do you actually need Ice and Water Shield?
A tricky part of IWS is determining whether you will need to install it on the roof or not. The International Residential Code (IRC) states that “In areas where there has been a history of ice forming along the eaves causing a backup of water… an ice barrier shall be installed”.
If that seems vague, it’s because it is. But that doesn’t mean it’s up to the roofer, adjuster or homeowner to tell if there’s history or not. The municipality with jurisdiction over the building is the one who should provide this information.
What goes into calculating Ice and Water Shield?
Now that you know how important it is to calculate your IWS correctly and if you really need it, let’s talk about some of the information you’ll need in order to effectively protect your roof.
Besides reaching out to the municipality to find out the requirements for IWS in the area of the building, you’ll need to gather some information about the roof you’re working on. While some of these measurements are standard, like the 24 inches distance from the inside interior wall, others must be measured accurately.
Once you have your roof size, roof pitch, eave length, valley length, soffit depth, stud size, and determine the material the building is made of, you can apply a mathematical formula to discover how far up you need to go on your roof with the Ice and Water Shield.
Sounds like a lot of work, doesn’t it? What if there was a way to calculate all of this, on top of having the municipality codes confirmed and data to back the numbers up? The good news: there is!
How to Calculate Ice and Water Shield?
To calculate Ice and Water Shield coverage accurately, you’ll need several specific measurements and a clear understanding of minimum code requirements.
Measurements Required:
- Roof Pitch – The steeper the pitch, the further the membrane travels vertically
- Eave Length – Total horizontal distance across all eaves
- Valley Length – Combined length of all valleys
- Soffit Depth – To determine how far in from the eave the wall starts
- Wall Thickness or Stud Depth – Impacts the horizontal run of the membrane
Minimum Code Requirements:
- According to the IRC, IWS must extend 24 inches past the interior wall line measured horizontally.
- This means on sloped roofs, you must extend more than 24 inches up the roof to achieve horizontal coverage.
Effect of Roof Pitch:
The steeper the roof, the longer the vertical length of IWS needed to cover the same horizontal interior wall distance.
Conversion to Material Quantities:
- Determine the required vertical coverage up the slope using pitch and wall measurements
- Multiply the required height by the total eave and valley lengths
- Divide the total square footage by the coverage area of one IWS roll (usually ~66.7 sq ft per roll)
IWS Calculation Example (with numbers)
Let’s say you’re working on a roof with the following characteristics:
- Roof pitch: 6/12
- Eave overhang: 12 inches
- Wall thickness: 6 inches
- Total eave length: 100 feet
- Total valley length: 30 feet
Step 1: Calculate Horizontal Distance
Wall thickness + overhang = 6" + 12" = 18"
Add required 24" horizontal coverage = 42" total
Step 2: Convert Horizontal to Vertical (Using Pitch)
A 6/12 pitch = 6 inches vertical rise per 12 inches horizontal
Use Pythagorean theorem:
- Horizontal: 42"
- Slope ratio: √(42² + (42 × 0.5)²) ≈ 50 inches up the slope
That’s approximately 4.17 feet of vertical coverage needed.
Step 3: Multiply by Total Linear Feet
Eaves + Valleys = 100 + 30 = 130 feet
4.17 ft height × 130 ft length = 541.7 sq ft required
Step 4: Convert to Rolls
541.7 sq ft ÷ 66.7 sq ft/roll = 8.12 rolls
Round up → 9 rolls needed
Common Mistakes When Calculating IWS
Even experienced professionals can miscalculate IWS needs. Here are frequent errors:
- Skipping Valley Lengths – Valleys require full membrane protection but are often overlooked
- Using Average Pitch – Always calculate based on the predominant pitch
- Ignoring Soffit Depth – Overhangs change how far up the slope the membrane must go
- Assuming Uniform Code – Local jurisdictions may increase minimum coverage, especially in snow zones
Tools to Simplify IWS Calculations
Many steps are involved in determining whether you need to install Ice and Water Shield on your roof and how much of it to use. This process can take up a lot of your valuable time, but there’s an easier way.
OneClick Code offers the most complete Ice and Water Shield calculator on the market — and it’s free.
This tool factors in:
- Your roof’s size and shape
- Material type and wall measurements
- Jurisdiction-specific code requirements
- Climate zone implications
Once the data is entered, the calculator delivers:
- Accurate IWS quantity
- Rounded-up roll counts
- Code-backed documentation
It’s like having a building official, estimator, and materials rep, all in one tool.
So, let’s get to work!